


Tarp it now only if you can reach the damage from a single story on dry, calm ground. If the storm is still moving through, the roof is steep, or you would need a ladder past one floor, don’t climb. Photograph everything first, contain the interior leak, and call a professional roofer or a company like Crowley Exteriors that handles emergency response.
TL;DR:
- Photograph the damage from the ground before attempting any repairs, and ensure safety conditions are met before stepping onto the roof.
- Use a contractor-grade, UV-resistant tarp with proper overlap and battens for pitched roofs, using elastic tie-downs to prevent tearing in high winds.
- Hire professionals if the roof is above one story, has a steep pitch, or if weather conditions pose a risk, as DIY tarping is only suitable for low-slope, dry, and calm situations.
- Document all mitigation efforts and keep receipts to help streamline insurance claims, especially when a licensed contractor conducts the tarping.
- Expect a contractor-grade tarp to last 4 to 6 months, and plan permanent repairs within 30 to 90 days to avoid mold and larger restoration costs.
Table of Contents
- What Should You Do First to Limit Roof Leak Damage?
- Should You Tarp the Roof Yourself or Call a Pro?
- How Do You Tarp a Roof the Right Way?
- What Tarp and Hardware Should You Use?
- How Much Does Emergency Roof Tarping Cost?
- How Long Does a Roof Tarp Actually Last?
- What Crowley Exteriors Prioritizes During an Emergency Call
- Get Emergency Tarping and a Free Roof Inspection
- Sources
What Should You Do First to Limit Roof Leak Damage?
The first hour after you spot a leak decides how much the repair costs later. Work through this in order, and don’t skip the documentation step even if water is actively dripping into your living room.
- Photograph and video the damage from the ground, including a wide shot that shows the whole roofline and a close-up of the breach if you can see it. Note the time and current weather conditions.
- Call your insurer, get a claim number, and ask what mitigation steps they require for reimbursement.
- Move furniture and valuables out of the drip path, set out buckets, and run a dehumidifier if the outlet is on a dry circuit.
- Cut power to any switch or outlet sitting under active water intrusion.
- If access is safe and low risk, stage tarping materials or install a temporary cover as part of professional emergency roof tarping services in Tucson. If not, call a professional roofer with emergency tarping services.
- Log who you called, when, and keep every receipt for materials or labor.
Should You Tarp the Roof Yourself or Call a Pro?
Roof height and weather decide this one, not how handy you feel today. A few hard nos: anything above one story, roof pitch steeper than 8/12, an active storm or sustained wind over 15 to 20 mph, visible structural sag, or a damaged area near power lines. Walk away from all five.
DIY becomes reasonable when you have a single-story, low-slope roof, calm dry conditions, a second person spotting from the ground, and actual fall protection, not just a ladder and good intentions.
- Two-plus stories or a steep pitch: call a pro.
- Active wind, rain, or lightning nearby: call a pro.
- Sagging decking or exposed framing: call a pro, and stay off the roof entirely.
- Single-story, low-slope, dry and still: DIY is workable with a helper and harness.
There’s also a claims angle most homeowners miss. Insurers often move faster on mitigation claims when a licensed contractor documents and installs the tarp, since a professional invoice and photo set carry more weight than a homeowner’s phone pics and a hardware store receipt. And the safety math backs up the caution: falls account for nearly 40% of construction-related deaths tracked by OSHA, and roof work sits near the top of that risk category. That statistic exists because people underestimate wet shingles and unstable footing, not because ladders are inherently dangerous.
How Do You Tarp a Roof the Right Way?
Getting a temporary cover to hold through the next storm comes down to sequence. Skip a step and you’ll be back up there in 48 hours re-anchoring a tarp that’s already flapping loose.
- Assess and photograph first. Walk the damage from the ground and, if safe, from a stable ladder position. Don’t touch anything until you have images for the insurer.
- Measure for size. Add 3 to 4 feet of overlap on every edge beyond the damaged area, and run the tarp at least 3 feet past the roof ridge on the opposite slope if the breach sits near the peak, so water can’t track under the top edge.
- Gather materials before you climb: a heavy-duty tarp, 2×4 battens, exterior-rated screws, a drill, a ladder stabilizer, a harness, and a partner on the ground.
- Install the top-edge batten first. Wrap the tarp edge around a 2×4 and screw it into the roof deck at 12 to 16 inch intervals, never through the tarp material alone.
- Secure the bottom and side edges the same way, working the tarp taut but not stretched tight enough to tear at the fasteners.
- On low-slope roofs, skip battens where possible and use sandbags or weights along the edges, angling the tarp slightly so water drains instead of pooling in the middle.
- Add wind reinforcement. Distribute tie-downs across multiple battens rather than relying on the tarp’s grommets, and use elastic bungees at anchor points to absorb gusts instead of a rigid line that snaps under load. In high-wind regions, professionals often add a second rope line over the top of the tarp tied to eave anchors as backup, which stops the whole cover from acting like a sail.
- Inspect from inside the attic once the tarp is set, checking for daylight or moisture at the seams.
- Recheck after the first rain and again after any wind event, looking at anchor points and looking for pooling.
Pro Tip: Never fasten a tarp through the grommets alone in wind-prone areas. Grommets tear out first; distributing the load across battens is what keeps the cover on the roof after the next gust rolls through.
What Tarp and Hardware Should You Use?
Skip the thin blue tarp from the garage. For anything beyond a pinhole leak, contractor-grade material rated 10 to 16 mil holds up far better, and coastal or high-wind zones call for the 12 to 16 mil range specifically.
- Sizing: add 3 to 4 feet of overlap past the damaged area on every side, and use one continuous tarp instead of piecing together smaller ones.
- Anchoring by roof type: battens and screws for pitched roofs, sandbags or weights for flat and low-slope roofs.
- Shock reduction: elastic tie-downs instead of rigid rope reduce the chance of tearing during gusty follow-up weather.
- Color and UV life: white and silver tarps reflect UV and outlast the standard blue tarp, which degrades faster under direct sun.
- On hand before you climb: tarp, battens, screws, drill, ladder stabilizer, harness, and a helper. Properly anchored setups can hold through wind loads of 60 to 80-plus mph depending on how the tie-downs are distributed.
How Much Does Emergency Roof Tarping Cost?
Professional tarping runs a wide range depending on how much of the roof is damaged and how hard it is to access.
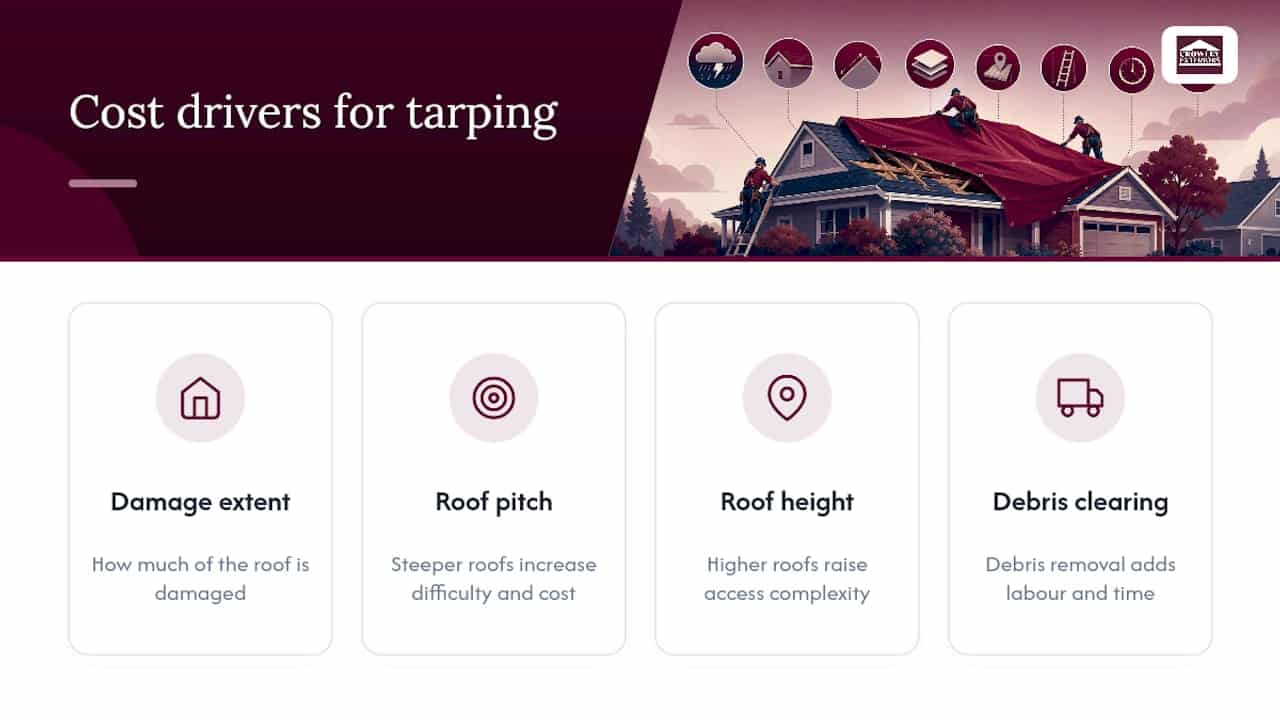
Roof pitch, height, debris clearing, and how fast you need someone on site all push the price up. For insurance purposes, photograph the damage before and after the tarp goes up, save every receipt, and request an itemized invoice that breaks out tarp, battens, and labor separately. A vague handwritten receipt slows a claim down; an itemized professional invoice tends to move it along.
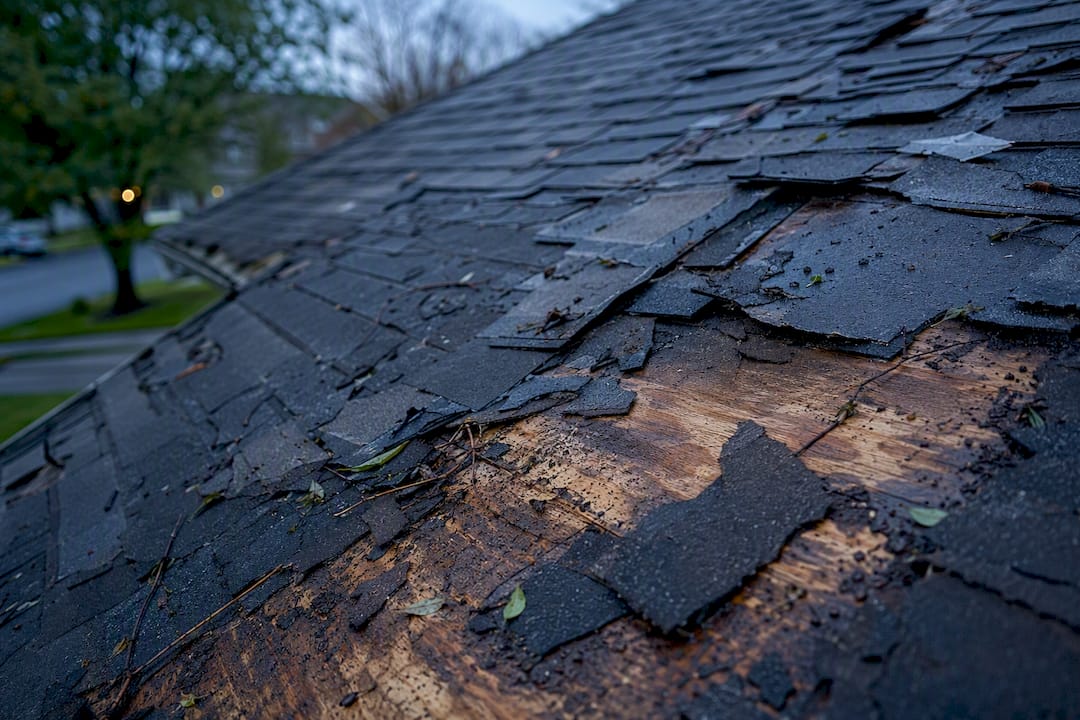
How Long Does a Roof Tarp Actually Last?
A standard consumer-grade blue tarp holds up for roughly 60 to 90 days before UV exposure and wind start breaking down the material. Contractor-grade tarps last longer, typically 4 to 6 months, depending on sun exposure and storm frequency.
- Inspect immediately after the first rain and after every wind event that follows.
- Watch for tears, battens working loose, or water pooling in low spots.
- Plan permanent repair within 30 to 90 days; re-tarp if the wait runs longer.
- Delaying repair past that window raises the odds of mold and a bigger restoration bill later.
What Crowley Exteriors Prioritizes During an Emergency Call
Every emergency call starts the same way for us: safety, then documentation, then a tight temporary cover that actually holds. We take insurance-grade photos before touching the roof, size the tarp correctly the first time, and give homeowners a transparent estimate rather than a vague number over the phone.
Being family-owned with more than 25 years in St. Charles County means we’ve seen what a rushed, undersized tarp costs a homeowner two weeks later. Free inspections come standard, and every emergency response leads into a clear plan for the permanent roof replacement or repair that follows.
— Mario
Get Emergency Tarping and a Free Roof Inspection
Crowley Exteriors handles the call most homeowners dread: storm damage that needs a cover today, not next week. Unlike a generic handyman tarp job, we bring insurance-grade documentation and a same-day response when conditions allow, plus a direct path into permanent repair once the storm passes.

When you call, have your address, a few photos of the damage, and your best contact window ready. We offer same-day tarping when it’s safe to access the roof, full documentation for your insurance claim, and coordination with your adjuster if you need it. From there, we schedule the permanent fix, whether that’s a full roof replacement or a targeted repair, and check gutters and drainage while we’re up there since standing water after a storm often causes its own problems through the gutter system. If your roof is currently exposed, schedule a free inspection and we’ll get someone out to assess it and give you a no-obligation estimate.